Malifaux - Guild Peace Keeper
You'd think I'd finish stuff before starting on other stuff right? Wrong! I've been working on a Malifaux Guild Peace Keeper the last few weeks and thought I'd show you where I am up to.
First up is some shots out of the box. This guy comes in lots of bits which do require some filing and cleaning to get it to assemble nicely. There are no assembly instructions, so you have to just work off the pictures on the box.

 Here's my assembled one - sorry I didn't take any in-progress shots of the assembly, but I ended up pinning most of the bits - the legs where a bit of a nightmare as they need to support the full weight of the body which is a single solid piece. It is a round socket join which is great for posing, but quite difficult to glue together.
 I ended up using a resin base I made and pinned both the feet to the base and then a single long pin through the sockets to join both legs.


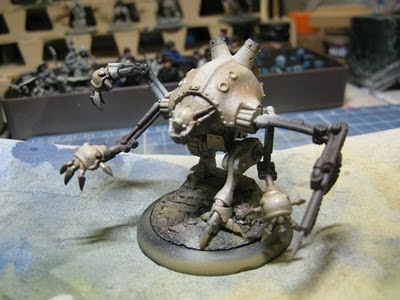
 The fastest way to paint this guy is with an airbrush - shown here is the Peace Keeper with a black undercoat, and the a spray of Tamiya Flat Brown and then picking out the highlights with Tamiya Desert Earth. Rob Jedi actually did most of the airbrushing to this point as he wanted to try it out and the Peace Keeper model was nearby.
 Finally, some more highlights picked out using Tamiya Deck Tan.


 The fastest way to paint this guy is with an airbrush - shown here is the Peace Keeper with a black undercoat, and the a spray of Tamiya Flat Brown and then picking out the highlights with Tamiya Desert Earth. Rob Jedi actually did most of the airbrushing to this point as he wanted to try it out and the Peace Keeper model was nearby.
 Finally, some more highlights picked out using Tamiya Deck Tan.


He's now ready for the metal parts to be painted, and then weathering added via the sponge technique and oil paints. More in an upcoming post!


Comments