Now we're getting down to the business end of things. The 10% of the miniature that takes up the 90% of the time! I knew this would be a massive exercise in weathering, but I was resolved to do all the chips and scratches using a paint brush rather than resorting to sponges and salt masks.
On the back-banner I finished off the red skull glyph by highlighting with Menoth White Highlight around the edges, and then applying weathering on top.
I started weathering the main plates on the claw arm using the same technique. It was a bit more difficult on the arm as the plates weren't as nicely defined in the cast as I would have liked, and a lot of the deeper areas ended up just being blocked and lined with a brown-black wash.
The back of the left arm.
The right arm was similar, except there was just the one shoulder pad to weather up with red paint.
And then slowly working my way around the body - the red is weathered the same as the other red bits, and the black is edged and chipped using Boltgun Metal.
A back shot:
Here's what the red looks like on the metal teeth before weathering is applied. I try to go for a smooth transition on the highlights and push the level up an extra step or two as the weathering will really bring it back to a darker tone once applied.
The head had the gums and tongue highlighted more, and though you can't see it here, a coat of Tamiya gloss over the top to give it some shine.
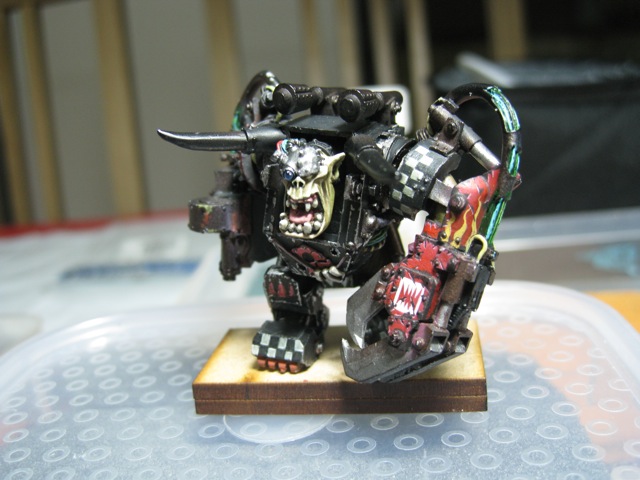
A dry fit of Ghazghkull - yeah it looks like the left arm is about to fall off as there's no glue.
Another shot of Ghazghkull. You can see most of the unfinished detail is on the top of him. I like leaving this till last so I can get a better visualisation of how he'll come together with all the different colours and parts.
And for those who have been asking, he's mounted temporarily on some
wooden bases I had lying around - these are a nice alternative to cork for large models where their size and weight gets a bit unwieldy.
And I can reuse them again once I pop Ghazghkull off as he is just pinned in with a small drop of superglue.


Comments